


Male Fertility
SP-10 Male Fertility Rapid Test
A rapid self-test for the qualitative detection of sperm concentration in human semen. Test results of less than 15 million cells/ml are an indicator of male infertility.
1 test per pack.
Accuracy
98%
Certifications
CE self-test | MHRA
Specimen
Semen
Self-test
-
The Male Fertility Test is a rapid test to estimate sperm concentration in human semen above or below 15 million / mL.
Sperm concentration is one of the primary factors used by physicians to diagnose male infertility. There are many reasons why a man may be infertile, the most common reason being an abnormally low production of viable sperm cells. Other reasons include over production of inactive, weak, or deformed sperm cells, high levels of other cells in the semen that interfere with fertilisation, or other physiological factors. Medical or physical conditions may also interfere with normal sperm cell production, including high stress, recent high fever or illness experienced within two months prior to testing, and abrupt changes in diet. Taking this initial screening test will indicate if a low amount of sperm production exists.
Up to 15% of couples experience infertility, which is defined as the failure to become pregnant after one year of unprotected, well-timed intercourse. In 40% of couples struggling with infertility issues, male infertility is the primary cause. An important first step in determining the cause of infertility is to test the sperm count, since low sperm count is a leading cause of male infertility.
The Male Fertility Test gives a positive result when sperm concentration is above 15million/ml in semen – a level internationally accepted as the minimum level of sperm for normal fertility. A low sperm concentration would indicate less likelihood of conception. It would be advisable to see your medical professional who can advise what can be done to improve the sperm concentration.
-
Specimen collection and preparation
Before testing, it is important for the subject to refrain from any sexual activity for 3-7 days. This ensures that the volume and quality of sperm is at its peak and the test will then be an accurate determination of sperm concentration.
Using masturbation, the semen should be collected directly into the sperm collection cup.
Care should be taken that the collected semen is not contaminated by touch of hands or tissues or any other materials.
Shake the semen evenly in the semen collection cup and leave it to stand for 1 hour at room temperature until the semen liquefies. Do not test semen that has been stored for more than 12 hours.
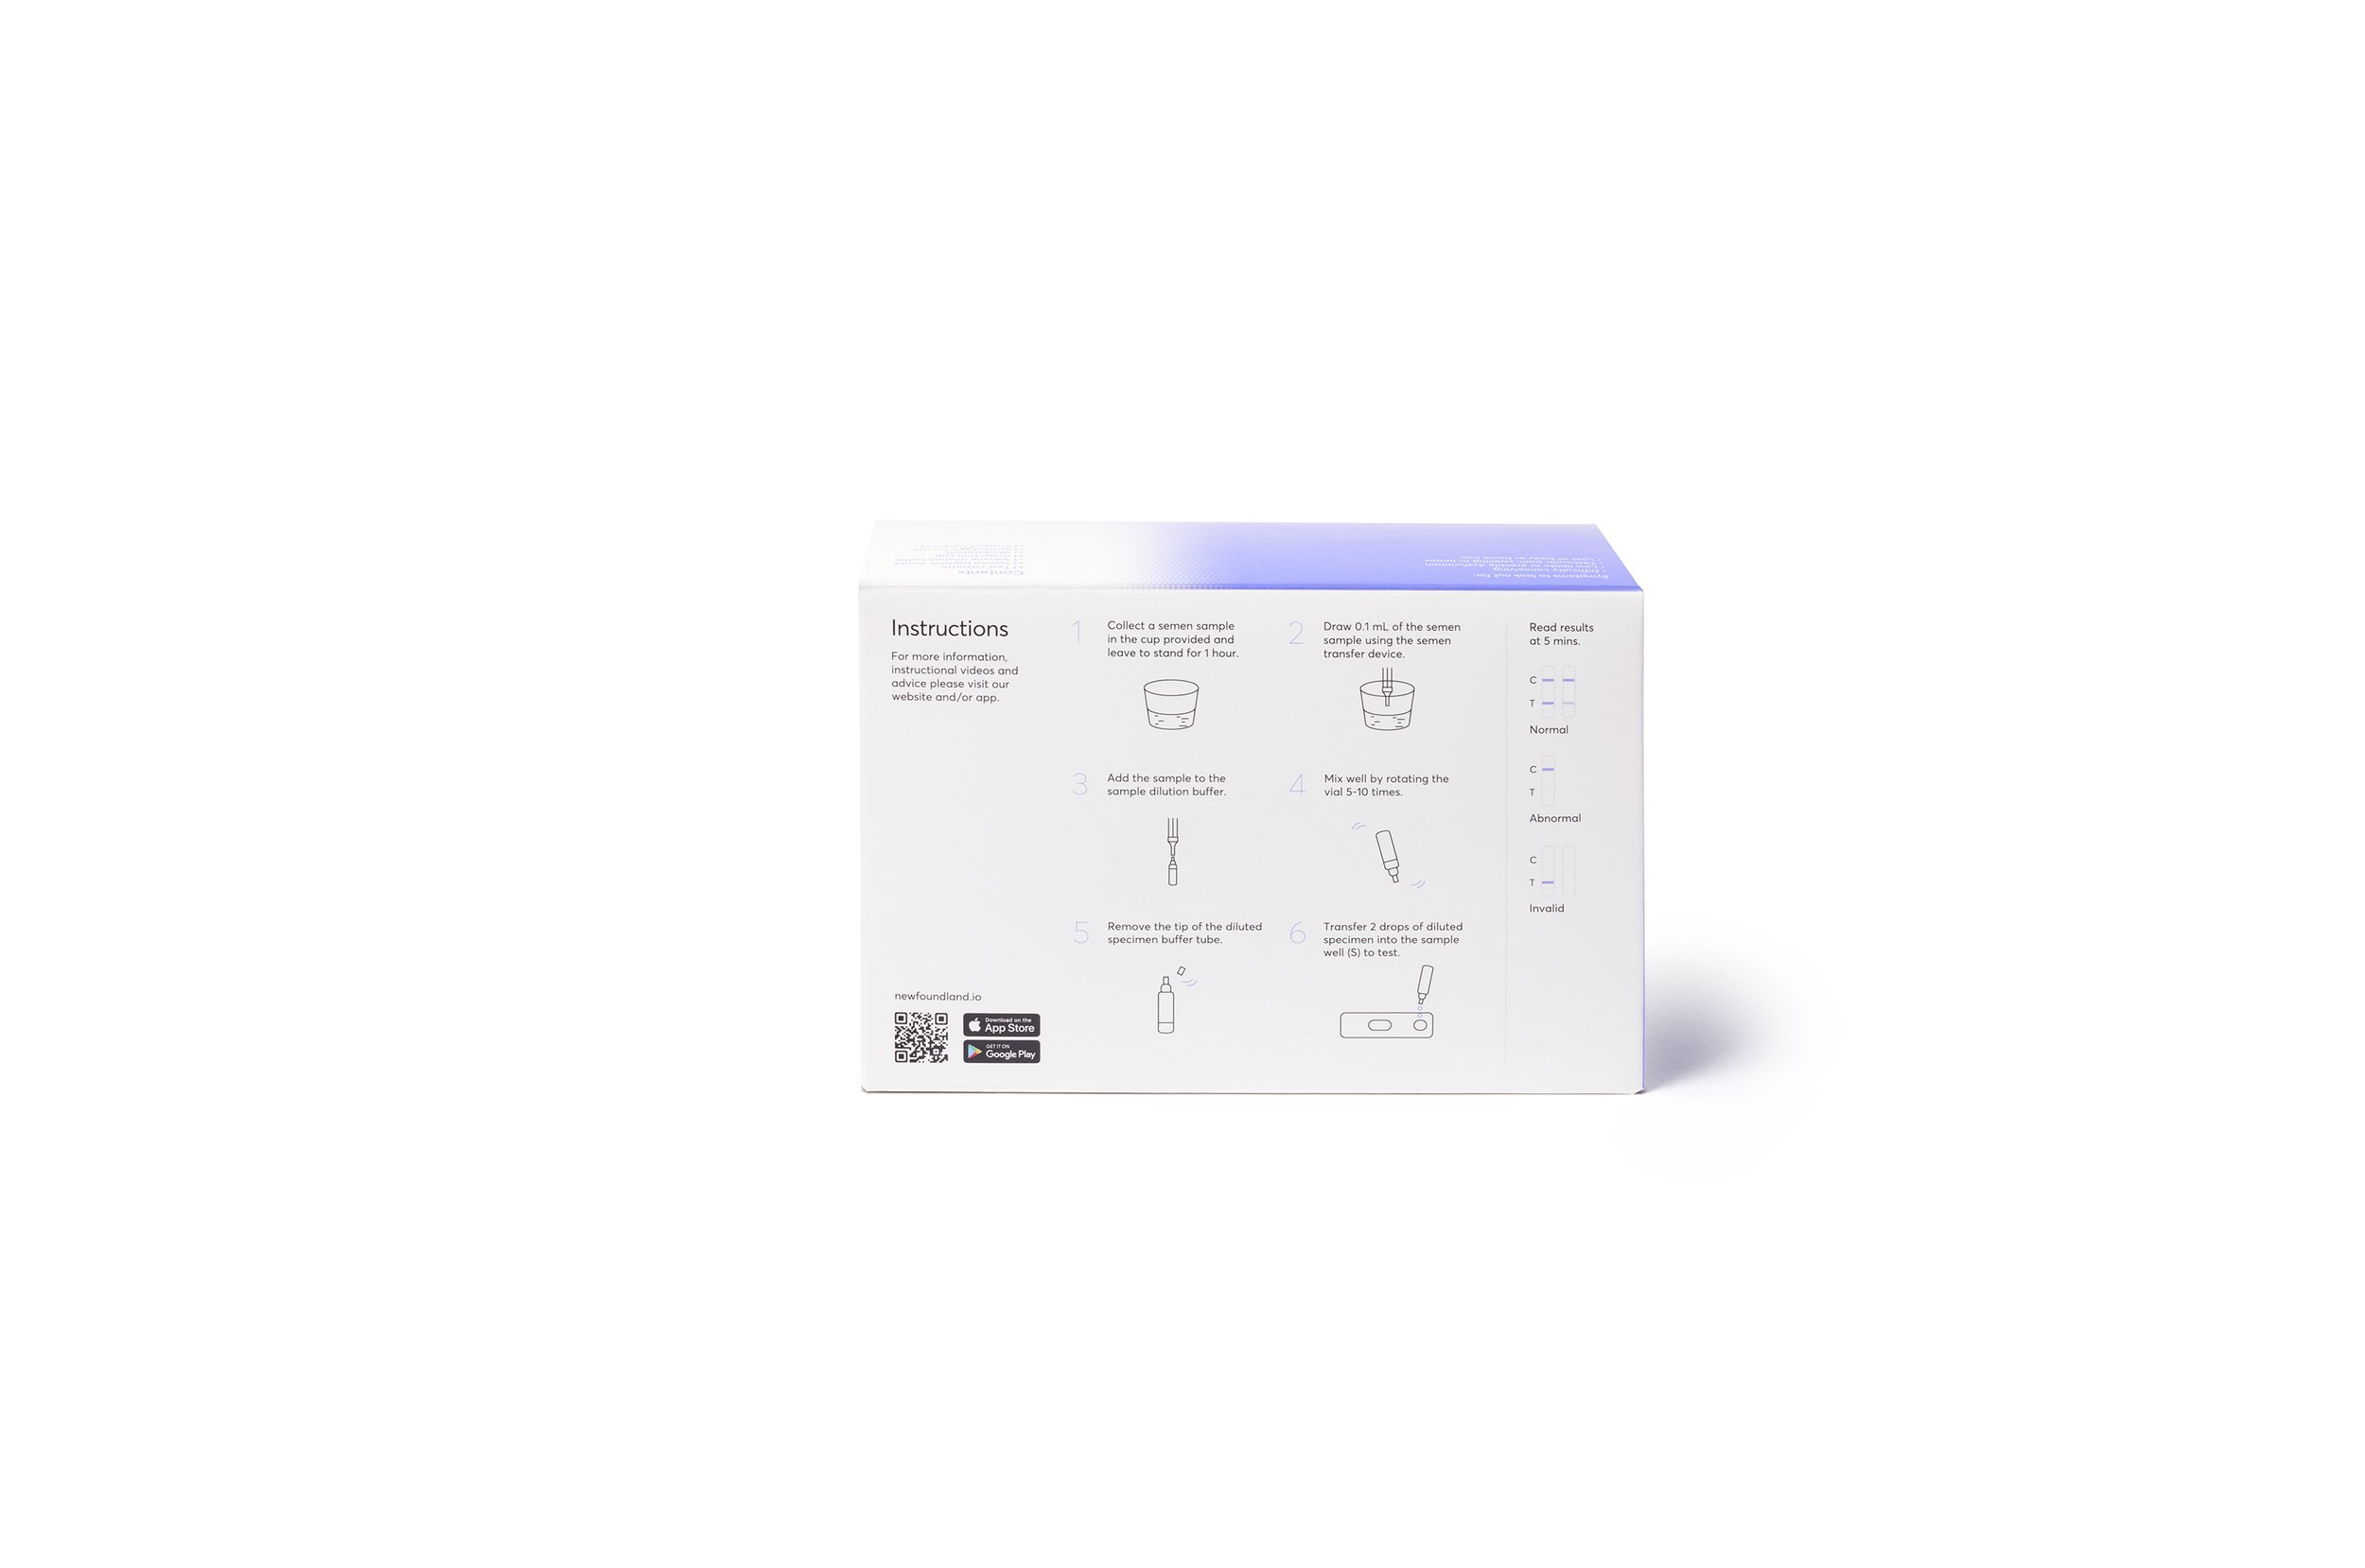
Procedure
1. Remove the test cassette from the foil pouch and lay it horizontally on a flat surface.
2. Input a semen sample into the cup provided.
3. Leave the sample to stand for 60 minutes, until the semen is fully liquefied.
4. Using the semen transfer device provided, fill up to 0.1ml indicated on the device with the semen sample. The sample is then added to the vial of sample dilution buffer provided.
5. Mix the semen sample with the test solution, turning the vial upside down 5-10 times.
6. Hold the buffer tube upright and open the cap onto the specimen collection tube. Transfer 2 full drops to the specimen well of the test cassette, then set a timer for 5 minutes.
7. Read the results 5 minutes after dispensing the specimen. Do not read the results after 10 minutes.
-
Read the results 5 minutes after dispensing the specimen. Do not read the results after 10 minutes.
NORMAL: Two coloured lines appear. One coloured line should be in the control line region (C) and another apparent coloured line should be in the test line region (T)*.
*NOTE: The intensity of the colour in the test line region (T) will vary depending on the concentration of SP-10 protein present in the specimen. Therefore, any shade of colour in the test line region (T) should be considered normal.
ABNORMAL: One coloured line appears in the control line region (C). No line appears in the test line region (T).
INVALID: Control line fails to appear. Insufficient specimen volume or incorrect procedural techniques are the most likely reasons for control line failure. Review the procedure and repeat the test with a new test. If the problem persists, discontinue using the test kit immediately and contact your local distributor.